How to Use Scrcpy GUI — Full Walkthrough of Every Feature
If you’ve ever tried using scrcpy from the command line, you know it works brilliantly — once you figure out the right flags. The problem is there are over 80 of them. Miss one and your stream runs at the wrong resolution, records to the wrong format, or drops audio entirely.
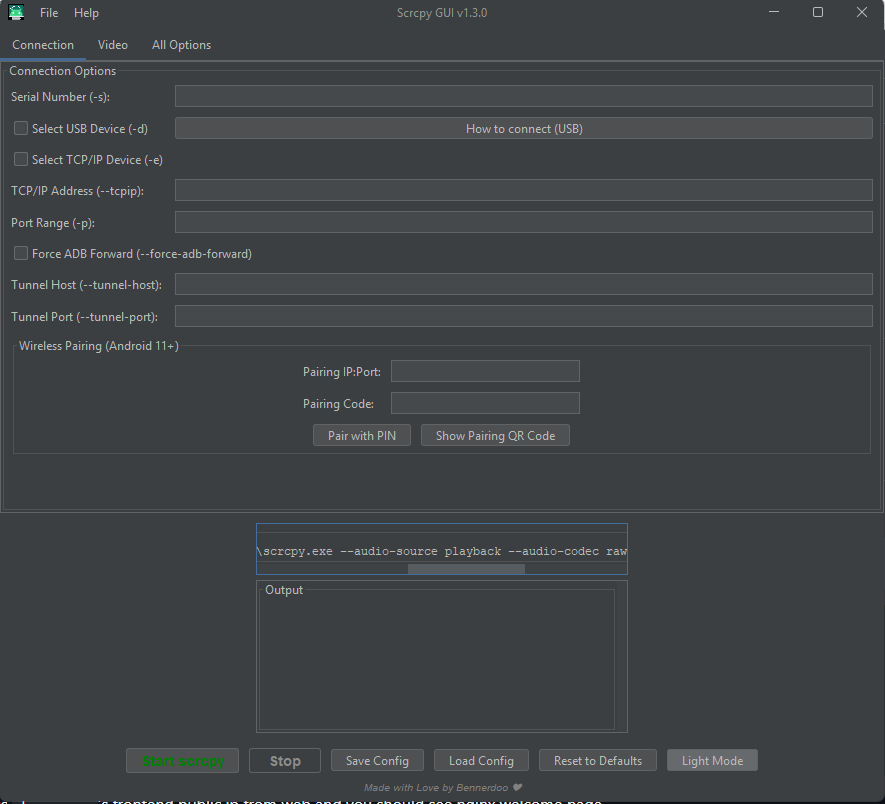
Scrcpy GUI fixes that. It wraps all of it into a proper Windows application — and unlike most scrcpy frontends, it ships with everything bundled. No separate ADB installation. No scrcpy download. No PATH configuration. You install it, enable USB Debugging on your phone, and it works.
The project is open source and available at github.com/Bennerdoo/scrcpygui.
Installation
- Go to github.com/Bennerdoo/scrcpygui
- Download the latest release from the Releases section
- Run the installer — ADB and scrcpy are bundled inside, nothing else to set up
That’s the entire installation. Most scrcpy GUIs make you install ADB separately, add it to your PATH, then download scrcpy and point the app at it. This one skips all of that.
The one thing you do need: USB Debugging
The only setup required is on your phone, and it’s a one-time thing.
Go to Settings → About Phone and tap Build Number seven times. This unlocks Developer Options. Go back to Settings → Developer Options and enable USB Debugging.
On some devices there’s a second toggle called USB Debugging (Security Settings) — Xiaomi phones in particular need this enabled or input injection won’t work even though mirroring will.
Plug your phone into your PC with a USB cable. Accept the “Allow USB Debugging” prompt that appears on the phone screen. Your device will now show up in Scrcpy GUI automatically.
Connecting your device
USB
Select your device from the device list and click Start Mirror. A window opens showing your phone screen. Clicks from your mouse translate to taps, your keyboard types into whatever field is focused on the phone.
Wireless (Android 11+)
Android 11 introduced wireless ADB pairing without needing a USB connection first.
On your phone: Settings → Developer Options → Wireless Debugging → Pair device with pairing code. Your phone shows an IP address, port, and a six-digit code.
In the GUI, open the Wireless tab, enter those values, and click Pair. After pairing once, you can reconnect wirelessly going forward without re-pairing — just use the device IP and the wireless debugging port shown in the Wireless Debugging screen.
For phones running Android 10 or earlier, connect via USB first, then use the wireless handoff option in the GUI to switch ADB to TCP mode and continue wirelessly.
Display options
Max size caps the stream resolution. Setting it to 1280 means the longer edge of the screen is scaled to 1280px, aspect ratio preserved. Lower values reduce CPU load on both sides. For day-to-day use 1280 is comfortable. For precise UI testing leave it at native.
Bit rate controls video quality. The default is 8 Mbps. Over a USB connection you can push this to 20–40 Mbps for noticeably sharper text and finer detail. Over wireless, 4–8 Mbps is the practical ceiling — above that you get buffering.
Max FPS caps the frame rate. Default follows the device (usually 60fps). Drop it to 30 on slower machines or wireless connections. For recording tutorials, 30fps produces much smaller files with no visible quality loss.
Orientation locks the mirror to a specific rotation — 0, 90, 180, or 270 degrees. Useful when testing landscape-only apps and you don’t want the window rotating when the phone tilts.
Turn screen off keeps the phone display dark while mirroring. The device is still fully controllable from your computer — the screen just isn’t on. Saves significant battery during long sessions.
Stay awake prevents the device from sleeping while connected. Useful for automated testing or extended recording sessions.
Window always on top keeps the mirror floating above other windows. Convenient when you’re referencing the phone while writing code.
Audio
Audio forwarding requires Android 11 or later.
Enable audio — toggles audio forwarding to your computer. On by default. Turn it off if you’re recording a tutorial and don’t want notification sounds bleeding into the recording.
Audio codec — opus is the default and recommended choice: low latency, good quality,
well-supported. aac is more broadly compatible if you’re piping the output somewhere else.
raw is uncompressed and produces large files — avoid it unless you have a specific reason.
Audio bit rate — 128kbps is fine for voice. For music or content creation bump it to 192 or 256.
Audio source — output captures everything the phone plays. microphone captures the
phone’s mic input, which lets you use your phone as a microphone for your computer.
Recording
Recording writes a video file directly from the stream. This is more efficient than capturing the mirror window with OBS — it records the raw H.264 stream without re-encoding, so quality is lossless relative to your stream settings.
Output file — set the path and filename. Format is determined by extension: .mp4 and
.mkv are both supported. MKV is safer if you might need to stop the recording abruptly —
unlike MP4, an MKV file won’t corrupt if the process is killed mid-write.
Record while mirroring vs record only — by default both happen simultaneously. The “no display” mode runs headless: recording without opening a mirror window. Useful for unattended recording or when you want minimum CPU overhead.
Orientation for recording can be set independently from the display orientation. You might mirror in portrait while recording in landscape for a specific output format.
Input control
HID keyboard — sends keyboard input as USB HID events rather than ADB key events. The practical difference: HID handles international keyboard layouts and special characters correctly. If you type in languages with accented characters, or your keystrokes are landing wrong, enable this. Requires USB connection.
HID mouse — same principle for mouse input. HID mouse gives precise, low-latency cursor control that behaves like a native input device on the phone. Scroll wheels and side buttons work correctly. Also USB-only.
Stay awake on connect — sends a wake event when the session starts so you don’t have to manually unlock the phone first.
Camera mode
Camera mode streams directly from the phone’s camera sensor instead of mirroring the screen. This bypasses the display pipeline entirely and can achieve higher frame rates.
Facing — front or back. For using your phone as a webcam, front is standard.
Camera size — the resolution to request from the sensor. Common values are 1920x1080,
1280x720, 3840x2160. Options depend on what your camera hardware supports.
Camera FPS — most cameras support 30 or 60fps. Some support 120fps at reduced resolution.
This mode is particularly useful for content creators who want a high-quality webcam without buying dedicated hardware, and for developers testing camera-facing apps.
Virtual display
Virtual display creates a second display on the device, separate from the physical screen. Apps launched into it appear in your mirror window but not on the phone itself.
Use cases:
- Testing multi-display behavior in your app
- Running a specific app on your computer while the phone stays undisturbed
- Launching apps in an isolated environment during testing
Set the resolution and DPI in the GUI, enable virtual display, and start the session. The phone screen can show something completely different — or stay off entirely — while you interact with the virtual display on your desktop.
Keyboard shortcuts
These work inside the mirror window:
| Shortcut | Action |
|---|---|
Mod + f | Toggle fullscreen |
Mod + g | Resize window to 1:1 pixel ratio |
Mod + x | Resize window to remove black borders |
Mod + h | Home button |
Mod + b | Back button |
Mod + s | App switcher |
Mod + n | Expand notification panel |
Mod + Shift + n | Collapse notification panel |
Mod + c | Copy device clipboard to computer |
Mod + v | Paste computer clipboard to device |
Mod + r | Rotate device |
Mod + p | Toggle screen on/off |
| Right-click | Back (screen on) / Power on (screen off) |
| Middle-click | Home button |
Mod is Left Alt on Windows by default.
Common problems
Device not detected — make sure you accepted the USB Debugging prompt on the phone. If you dismissed it, go to Developer Options → Revoke USB debugging authorizations, unplug, plug back in, and accept it again.
Choppy video over wireless — lower bit rate to 4 Mbps and max size to 1280. Wireless performance is very sensitive to network quality; a 5GHz connection dramatically outperforms 2.4GHz.
Audio out of sync — lower the bit rate or switch from Opus to AAC and see if sync improves.
Black screen — some manufacturer skins (MIUI, One UI) restrict screen capture at the system level. Try enabling “Disable permission monitoring” in Developer Options, or look for a dedicated screen capture permission on your device.
Input not registering — if clicks aren’t landing, disable HID mouse and fall back to ADB injection mode. If keystrokes don’t work and you’re on a Xiaomi device, enable the secondary USB Debugging (Security Settings) toggle mentioned in the setup section.
Source code and releases at github.com/Bennerdoo/scrcpygui. If something isn’t working or you want a feature added, open an issue there.